This tutorial will take you through the process of creating a simple (and stupid) gamebook called Skeleton Passage, using Gordian Book. To follow the tutorial you will need a copy of Twine, which you can either download, or run in your browser. You can also get a completed copy of Skeleton Passage, if you just prefer to read along rather than type.
Installing Twine
To begin, you need to get a copy of Twine from twinery.org. Twine is a program for writing interactive fiction (IF), created by Chris Klemas. Normally Twine produces web-page-based games using packages of Javascript called Story Formats, but Gordian Book can turn a Twine story into a traditional gamebook.
You can download a copy of Twine for PC, Linux, or OSX, or run it in your web browser. At the time of writing the current version is 2.4.
Starting your Story
Once you've got Twine open, create a new story and call it Skeleton Passage. Twine will create a blank starting passage for you in the middle of the screen. A passage is the basic building block of your game, and will translate to a single numbered section in the output.
Note the green rocket, this tells you that this is the start passage, where the story begins. Edit this passage (by double clicking on it) and change its name to skeleton passage. (Note the lower case. You don't have to name things in lower case, but you need to make sure that you name passages and links to them the same, and naming things all lower case can help get it right, so it's what we will do here.)
Now, put the following text into the passage:
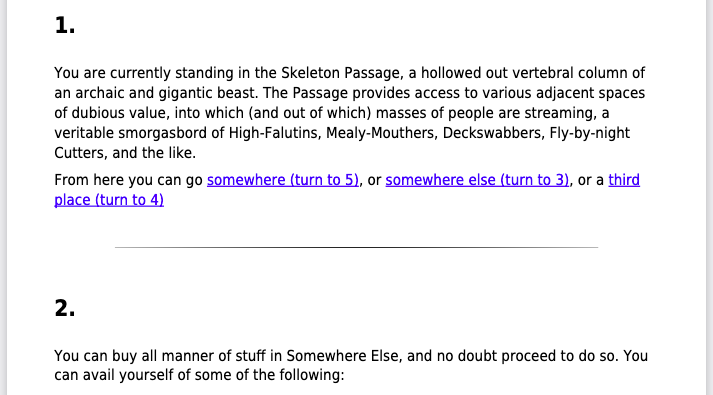
    You are currently standing in the **Skeleton Passage**, a hollowed out vertebral column of an archaic and gigantic beast. The Passage provides access to various adjacent spaces of dubious value, into which (and out of which) masses of people are streaming, a veritable smorgasbord of High-Falutins, Mealy-Mouthers, Deckswabbers, Fly-by-night Cutters, and the like.

    From here you can go [[somewhere]], or [[somewhere else]], or a [[third place->elsewhere]]
I'm not going to describe the process of making passages and formatting text in Twine in detail, there are better guides out there, but the important things here are:
You can format text with markdown tags like ** (for bold). See Supported Text Formatting for a full list.
You can make paragraphs by leaving blank lines.
You can make links to more passages by putting them in [[ ]]. If you just have text, that must be the name of the new passage. You can have different text from the name by putting [[text->passage]], [[passage<-text]] or [[text|passage]].
When you save this passage, you'll see that Twine automatically creates new blank passages for each of the destinations you linked to: "somewhere", "somewhere else", and "elsewhere".
Opening your story in Gordian Book
This isn't much of a game (it only really has one section), but you could already open this in Gordian. To do this, first export your story by choosing Build -> Publish to File. Now, open the Gordian Book website (you know, the one you are on), and click the Import Game link. You can select your file and then upload it. It will automatically be converted into a game.
You can open the game by clicking Preview Gamebook. You'll see four sections, numbered 1 to 4. The start section (skeleton passage) is always section number 1. The other three sections actually appear in a random order, not that you can tell since they all have the same text (nothing).
You are currently standing in the Skeleton Passage, a hollowed out vertebral column of an archaic and gigantic beast. The Passage provides access to various adjacent spaces of dubious value, into which (and out of which) masses of people are streaming, a veritable smorgasbord of High-Falutins, Mealy-Mouthers, Deckswabbers, Fly-by-night Cutters, and the like.
There's not much to Skeleton Passage so far, so let's fill in a few more sections. This part is just adding text and descriptions, so feel free to blindly copy and paste (or write your own). The key is just to have a few places to visit.
somewhere
This is Somewhere. Somewhere is a fine place, all the fashionable people in this adventure want to come to Somewhere. Lowlifes, cutters, and bogsnatchers are not permitted here, and will be impolitely [[turned away at the door->skeleton passage]] with barely a "Your sort don't belong here!" for your trouble.

There is a lot to do in Somewhere, if, by *a lot*, you are content to mean preening, walking, swanning about, and being seen by all the other fine and fashionable people.

When you are done with Somewhere, you can [[return to Skeleton Passage->skeleton passage]]
somewhere uses * * to indicate italics.
somewhere else
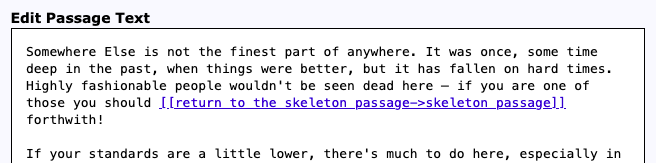
Somewhere Else is not the finest part of anywhere. It was once, some time deep in the past, when things were better, but it has fallen on hard times. Highly fissionable people wouldn't be seen dead here — if you are one of those you should [[return to the skeleton passage->skeleton passage]] forthwith!

If your standards are a little lower, there's much to do here, especially in terms of [[shopping]], victualling, and gossipping.

When you are done with Somewhere Else, you can [[return to Skeleton Passage->skeleton passage]]
elsewhere
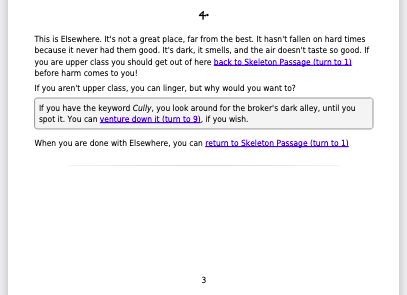
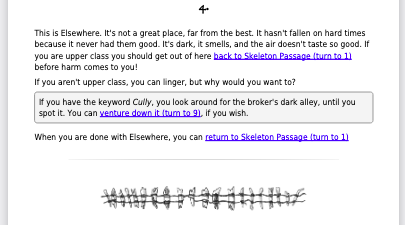
This is Elsewhere. It's not a great place, far from the best. It hasn't fallen on hard times because it never had them good. It's dark, it smells, and the air doesn't taste so good. If you are upper class you should get out of here [[back to Skeleton Passage->skeleton passage]] before harm comes to you!

If you aren't upper class, you can linger, but why would you want to?

One of the darkest, meanest, narrowest alleys, appears to lead to [[a place->dark alley]].

When you are done with Elsewhere, you can [[return to Skeleton Passage->skeleton passage]]
If you open the story in Gordian now you'll see that these three sections appear in a random order in the game. If you click Convert to Gamebook the passages will be shuffled and appear in a new order, although always with the 'start' passage first.
Note: we created two new passages here, "shopping" and "dark alley". Don't worry about them, we will come back to them later.
Beginnings and Ending
Adding an Introduction
So far we have just done some basic Twine things — written passages and linked them together. There's nothing Gordian specific in our game so far, but Gordian has many special passages — prefixed with gb- — to add things like covers, afterwords, and introductions. Let's add an introduction.
Create another passage and call it gb-introduction. This passage will appear before the start of the game. Fill it in with:
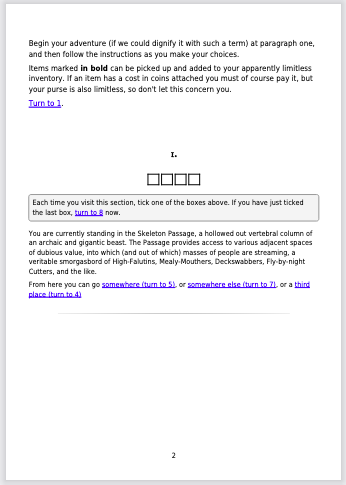
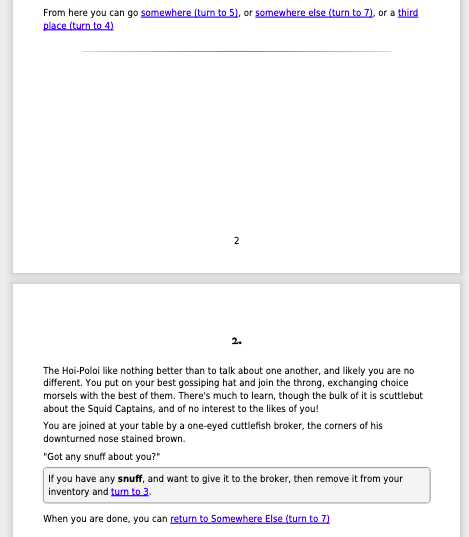
Begin your adventure (if we could dignify it with such a term) at paragraph one, and then follow the instructions as you make your choices.

Items marked **in bold** can be picked up and added to your apparently limitless inventory. If an item has a cost in coins attached you must of course pay it, but your purse is also limitless, so don't let this concern you.

[[Turnto|skeleton passage]].
You don't have to link to your start passage in the introduction, but it's a good idea (and will help if you want to use the "playable HTML" format). Note that we've used a special link name here Turnto. This will be replaced with the phrase "Turn to X" (where X is the passage number — 1 in this case)
Skeleton Passage
Begin your adventure (if we could dignify it with such a term) at paragraph one, and then follow the instructions as you make your choices.
Items marked in bold can be picked up and added to your apparently limitless inventory. If an item has a cost in coins attached you must of course pay it, but your purse is also limitless, so don't let this concern you.
If you are paying attention, you'll see that we added yet more places in the previous section; a "dark alley" and "shopping". We'll come back to shopping, but a dark alley sounds like a place to meet a sticky end, so let's add a classic gamebook ending.
dark alley
Oh.

You shouldn't have come here.

You really shouldn't.

But the good news is, at least you save on the cost of a funeral!
deathlast
This alone isn't quite an ending — where's the "YOU ARE DEAD"? To add extra behavior to the passage we need to give it a tag, which is a Twine thing that you can add to your passages. Click the + Tag button and add a tag of death. Death (note the lower case) is a special Gordian tag which will cause the text YOU DIED to be shown after the passage. You can customise that death message of course — more on that later.
There's a tradition from Fighting Fantasy that the final paragraph of an adventure should come last. Since "dark alley" is our one and only ending, it would be nice to have it last. Currently there are 6 sections in the game, so we could tell Gordian that we want this to be section 6. You can do this simply by adding a tag of 6 to the passage. However, if you then add some more passages, you'll have to come back and change the number. A better option is to add a tag of last, which tells Gordian you want this section to appear at the end.
But the good news is, at least you save on the cost of a funeral!
YOU DIED
If this is an ending, but not a death, you could use the tag "end" instead of "death".
Making it pretty
So far we've been putting together a game that will produce a fairly boring PDF — which is why we've not taken a look at the PDF version. Let's do that now though. Click Export Gamebook PDF and a PDF will open in a new window.
Page Size
By default your game will be printed on A4 pages, which will probably look a little daft with so little text. To change these defaults have a look at Edit Settings. (This is where we can change the death message, by the way.)
On the settings screen, change the page size from A4-P (A4, portrait) to A5-P. A full list of possible page sizes can be found in the documentation for MPDF, which Gordian uses to create the PDF version. Feel free to change any of the other settings, if you like — for example you can add a separator (which looks like a tapered line) between each section with the Use paragraph separator? option.
Covers
Some covers would probably also be nice, so let's add some. Create the following passages:
gb-front-cover
gb-rear-cover
These two passages are written using HTML, and take advantage of some of Gordian's built in classes (e.g. cover_top and cover_bottom). The image is one built-in to Gordian, you can use any URL to an image on the internet for your illustrations — be sure you have the rights to use them!
Now, when you preview the PDF you'll see the front and rear covers.
Note: You can edit the contents of gb-front-cover and gb-rear-cover in Gordian (as well as gb-introduction and gb-rear) by clicking on Edit Introduction/Cover.
Styling
The PDF still looks a little plain. To tweak it, you can edit the Stylesheet in Twine. Let's spruce the game up a bit by centering the passage numbers, and using a more gothic font for them. At the same time we can add a little white-space to that cover image we added.
Open the Twine Stylesheet Story -> # Stylesheet and add the following:
What are we doing here? The first two rules are tweaking the cover, making the font larger, and adding some space to the top of the image. The third rule makes headings inside .paragraph elements (the sections of the game) bold, and in a custom font called "IM Fell DW Pica" that Gordian includes. It does the same to .end elements — the "death" and "end" messages. The final rule centers the h2 elements that are used for the passage numbers.
Take a look at the generated html page to see all the things you might want to style.
Note: You can edit the contents of the stylesheet in Gordian by clicking on Edit CSS.
Editing in Gordian
So here you are, playing around with covers and styles, and you suddenly realise that in somewhere else you wrote "highly fissionable people" when you really meant "highly fashionable people" (Did you copy and paste the deliberate typo? I bet you did.)
On the story preview, click the (Edit) link next to "somewhere else", or Edit Passage and then choose "somewhere else" from the list down the side.
On this screen you can edit the passage text, and see a preview of how it will look down below. You can also click the Preview as PDF link to see a PDF preview of just this section. You can also move passages around from this page, swapping or changing their numbers. For more on this, see the section on publishing, below. For now, just correct the spelling mistake, and click save. You'll see that the change is now visible if you reload your PDF.
But wait! Up until now every change has been made in Twine, and then uploaded into Gordian — now we've made a change in Gordian, how does that get back to Twine? In fact, back in the previous section we made a change to the settings in Gordian, and that's another thing that won't make it back to Twine unless you export it.
Let's start with settings. Settings are special, in that you can export them separately from the rest of your game. Click Export Settings, to download a document containing your game's settings. They are in a format called JSON. You can import a settings file into Gordian with the Import Settings option, which will override the settings in your current game.
You can also save those settings inside your Twine game, by creating a passage called gb-settings and pasting your exported settings into it.
You aren't limited to just exporting settings, you can also export your entire game out of Gordian. You can do this is a bunch of different formats, all of which are listed in the Export section at the top of the main page:
HTML (proofing) — a simple HTML version intended for proofreading
HTML (playable) — a simple HTML version that shows one section at a time, for playing
Twee — a plain text format for import into other IF software
Gordian JSON — a sort of "snapshot" of Gordian, you can import it again as is
Twine Archive — a Twine file
The most important of these is the Twine Archive, because you can import that directly back into Twine, along with any changes you've made to passage text, styles, or settings. In Twine go to Library -> Import, then select the file you exported, checking the tick-box next to the name of your story (Skeleton Passage). Once you click "Import Selected Files" your Twine story will be replaced with the exported one.
Important! Since Gordian doesn't save your games when you aren't working on them, always export a copy when you've made changes!
Numbering
When you look at the Export section you'll that the Twine and Twee formats have two options, with and without numbering. When you load your game into Gordian, numbers get assigned to each passage (check back to section 3 for more on this if you missed it). Once Gordian assigns numbers, they don't change unless you click "Convert to Gamebook" again. If you export the game back to Twine, those numbers will be added as tags to each passage (e.g. "2", "3", "4" and so on). The next time you import the game, those tags will make sure the passages stay in the same order.
However, if you are still editing/writing your game, you probably don't want to finalise the numbering. Not only can it make it awkward to add new sections (they will all come at the end), but it makes the tag list in Twine 2.4 a pain to use. For this reason, until you are in the final stages of proofing and publishing your game, you are better exporting without numbers.
Note, if you added any numbers yourself, with numbered tags, they will still get saved back to Twine, only the tags that Twine has added itself will be skipped.
Adding Interactivity
So far the game we have been making isn't much of a game. You can wander from place to place, but there are no rules interactions or significant choices (other than the "gotcha" of dying when you visit the dark alley). Let's change some of that.
Items
Back in part three we created a "shopping" passage, but left it blank. Let's fill it in now.
shopping
A couple of interesting things here. First, we have a list of items marked up with * at the start. A single star like this is one way of creating a bulleted list. The second thing is the use of the <item></item> tag. This is a Gordian specific tag that will cause the item to me marked up in bold (by default), but also recorded so that Gordian can list an item's uses for you.
You can view all the items that appear in your game by looking at the Item Report, which will show you each distinct item in the game, and which passages they appear on.
Rules text
You can buy three items now, but there isn't anything to do with them, let's add a passage where you can. Edit "somewhere else" and turn [[gossiping]] into a link, which will create a passage of the same name.
gossiping
Here we use another Gordian tag <rules></rules>. This wraps your rules text in a box so that it's called out from the text as a whole. By default it looks like this:
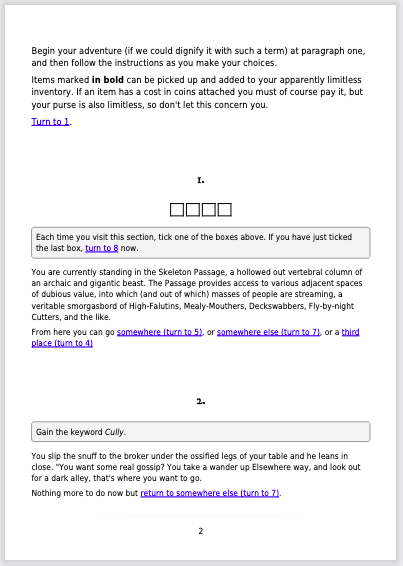
The Hoi-Poloi like nothing better than to talk about one another, and likely you are no different. You put on your best gossiping hat and join the throng, exchanging choice morsels with the best of them. There's much to learn, though the bulk of it is scuttlebutt about the Squid Captains, and of no interest to the likes of you!
You are joined at your table by a one-eyed cuttlefish broker, the corners of his downturned nose stained brown.
"Got any snuff about you?"
If you have any snuff, and want to give it to the broker, then remove it from your inventory and turn to 2.
We've given the broker some snuff. In return he will share some hot gossip. To track that we've done this, we can use a keyword.
broker
A keyword tracks that something has happened in the game — think of it like a variable in a programming language, except that the player has to track them.
Keywords can be tagged with <keyword></keyword>. By default Gordian will style these in italic, but some games prefer to have them in ALL-CAPS, or underline them — you can change these things in the stylesheet for your game by styling the .keyword class. You can track all the keywords in your game using the Keyword Report, which lists all your keywords and the passages they appear in.
When you are writing a large game you can use the report to check that your keywords appear where you expect. Keywords that appear only once in the game are called out, since that's probably a bug.
Let's add a use for that keyword, by editing "elsewhere":
elsewhere
Note the use of <k> as a shortcut for <keyword>. You can do the same with <it> instead of <item>. Also note how we send the player on a pointless quest only to have them kill themselves by visiting the alley — quality content.
Checkboxes
Keywords are good for tracking a particular yes/no event — have you met the monster, read the inscription, or bribed the guard. Items are good for things you might gain and lose over the course of a game, possibly many times, if the item is something like a ration or a torch. Sometimes, however, we want to track how many times a particular event happens. We can do this with checkboxes.
The <checkboxes></checkboxes> tag produces a row of boxes that the player can tick. Often we will use them to track how many times a particular section has been visited — perhaps you can only ask your father for help three times before he refuses to do more. Let's add some checkboxes to "skeleton passage" by adding the following to the start of the passage.
Each time you visit this section, tick one of the boxes above. If you have just ticked the last box, turn to 6 now.
The content of "too many" is left as an exercise for the reader, though you can always check the sample copy of Skeleton Passage to see what I put.
Reference Sheets
If your game has many keywords and checkboxes, you may wish to provide a reference sheet that your players can print out and mark things down on, rather than mar your original (which might be a PDF, or a printed book). Add the passage checklist, and give it the tag backmatter, which will cause it to appear at the end of the game, after the last numbered section.
checklist
backmatter
This will create a page with a list of keywords and passage numbers with checkboxes.
You can record keywords and ticked checkboxes here.
Cully
1
Reusing Code
As your game gets larger you may find yourself writing out the same blocks of text multiple times, often with complex formatting. A classic example would be the stats for a monster, or a set of instructions about eating rations and regaining health. You can reduce the effort this takes by including one passage in another, and by creating templates.
Including Passages
You can include one passage in another using (display: "passage name") or <<include "passage name">> (that's code from two of Twine's most popular formats, Harlowe and Sugarcube). The included passage's content replaces the tag. Links and Gordian tags in the included passage still gets processed. To prevent your included passage from also appearing in the story, give it the skip tag.
Templates
Included passages don't get to vary from one use to another, they will always display exactly the same text. Imagine you wanted to display a message on each of "somewhere", "somewhere else", and "somewhere" that said:
You may only enter this area if you have a status of at least X.
Where "X" is different for each one — an include can't help you, but a template can. A template is a piece of code that Gordian runs as it displays your passages. Crucially, it can substitute values into the text, conditionally display text, and repeat values. You could achieve the rule above with a template like:
Which you would use in your passage like:
Let's make a better example. Go back to "victualling". Do you see how we had to type out all three items in the shop by hand, like peasants. Let's replace this with a template.
Make a new passage called gb-templates, this is where all templates live.
gb-templates
Now, go back to "shopping" and replace the three bullet points with:
There … isn't that better?
More details on the templating system, and some actually useful examples, can be found in the Templating System instructions.
Publishing
Eventually, your game will start to reach a finished state. You've written all your content, and you start to think about proofreading, playtesting, adding illustrations, and publishing. Until this point you will work mainly in Twine, perhaps occasionally testing things in Gordian, but from this point on, you may find it easier to work primarily in Gordian.
Proofing
Once the game is written, but before you finalise the layout, you will likely wish to proofread and playtest the game. Ideally you will find others to help you do so. The Export HTML (proofing) link will create a simple HTML version of your game with the passage names and IDs (an internal number Twine uses) visible. You can pass this version to other people to test, and get their feedback with passage names attached, which will make it easy for you to make changes.
Before sending out proofs, it's a good idea to spellcheck your game. As of writing, Twine does not have a built-in spellchecker, but you can export your game to a file and spellcheck that, then import back into Twine. If you choose to do this, make sure to use a text-editor to spellcheck, rather than a word-processor, to avoid having any of the code in the file accidentally changed.
Final Numbering
After you get your initial feedback, and add the inevitable missing sections, it's time to finalise your number ordering. Import the game into Gordian, convert it, and then export it back to Twine — this time with numbering. You will now have a version with a numerical tag on every passage. From now on, each passage will keep its number.
Once the passages have their final order, you will undoubtedly find gaps where passages don't really fill pages, which can look ugly.
You've got three options with pages like this:
Ignore the issue
Fill the gaps with images
Move passages around to fill the gaps
Most likely you will do a bit of all three.
Images
You can use images from anywhere on the internet, Gordian doesn't host images for you, or allow you to upload images. If you really need to do this, consider installing Gordian from its github repo. You can use a variety of formats, but your best choices are PNG or JPEG. If you are aiming for screen use only you should definitely consider JPGs, since PDF files support compression for JPG images.
You can place an image directly in a passage, but you may find it useful to make use of the <before> and <after> elements, which place content outside the passage itself. The <page-before> element puts its contents on a full page before the passage — make sure the passage it's in is placed at the top of a page or you will get very strange results.
You can switch a file dynamically between low and high resolution images using the Enable low-res mode for screen PDF? option in settings, and using {RES} somewhere in the URL of your images. Gordian will replace {RES} with "300" when in print PDF mode, and "72" when in screen PDF mode.
Let's add an image to Skeleton Passage. Find a passage with a smallish gap after it. For example paragraph 4
Edit your chosen passage to add this at the bottom:
.cut is a built-in Gordian class that adds some vertical padding around the image. .center centers it horizontally across the page. The result is:
Moving Passages
You can move passages around from the Edit Passage link, which we described in section 6, above.
Using this form, you can swap one passage with another directly, or move a passage to a new number — which will push all other passages up or down in number to make room. The easiest way to know what passages to swap is just to glance over the PDF for something that looks the right size, but you can see exact sizes of each passage at the bottom of the edit screen (under the preview) which may help you pick the right one.
In the example above, there's a big gap after passage 1, because passage 2 won't fit in the space.
If we edit passage 2 and use the Swap with function to swap it with passage 3, things fit a lot better.
Useful Tags
Sometimes the issue is a passage being too long. Normally, Gordian won't split a passage across pages, but you can add the long tag to allow this to happen.
Sometimes you just need to force a page break, you can do this by tagging your passage with breakbefore or breakafter. In a lot of cases you'll want to place breakafter on gb-introduction.
Preview Page Ranges
While swapping passages in this way you may need to refresh the PDF preview frequently. This is a pretty slow process, so you will probably find it easier to use the PDF: page range link to view a section of the document at a time.
Note: this is more a "passage range" than a page range, so be sure to start with a passage that's at the top of a page, or you will get a very confusing result.
Conclusion
If you've been reading along the whole way, congratulations, you've reached the end of the tutorial! Skeleton Passage has enjoyed your visit, and I hope you will go on to enjoy using Gordian Book for your game. If you have any more questions, check the detailed guides linked on the home page, or drop into the Twine Discord and ask @Hituro.